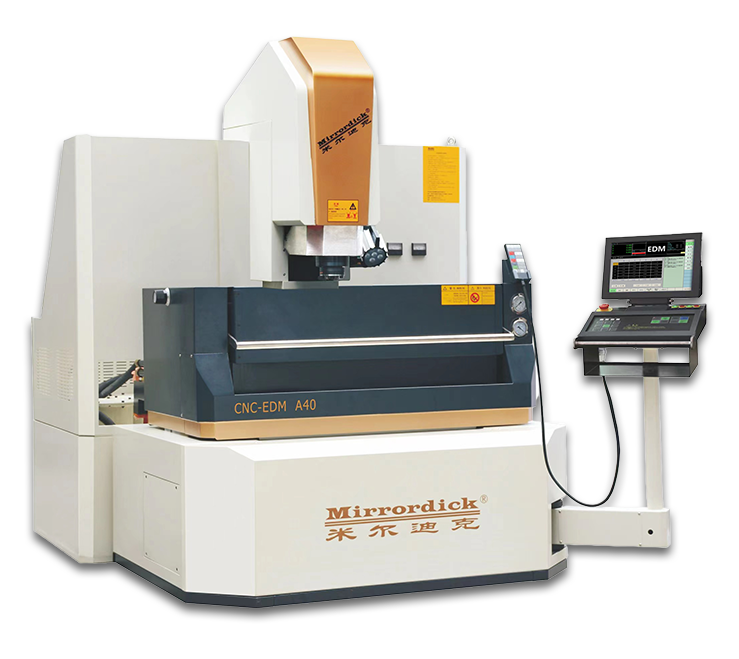
As high-precision machining equipment, the performance stability and machining accuracy of mirror EDM (Electrical Discharge Machining) machines are highly dependent on standardized daily maintenance and servicing. Scientific maintenance not only extends the equipment's service life (usually by 3-5 years) but also avoids machining errors, production halts, and other issues caused by equipment failures, ensuring machining quality (e.g., maintaining a surface finish of Ra ≤ 0.1μm and a repeat positioning accuracy of ≤ 2μm). Below is a professional maintenance plan covering daily checks, weekly maintenance, monthly servicing, and quarterly in-depth maintenance, tailored to the characteristics of the equipment's core components.
I. Daily Pre-Startup/Post-Shutdown Checks (Core: Ensuring "Hazard-Free Startup" of the Equipment)
Basic checks must be completed before daily operation to eliminate immediate risks; after shutdown, cleaning and status reset are required to prepare for the next day's operation.
Inspection of the Working Fluid System (Core Medium for EDM)
Liquid Level and Cleanliness: Check if the working fluid tank level is within the scale range (usually "MIN-MAX"). If it is below "MIN", replenish with the same type of dedicated working fluid (avoid mixing different brands, as this may reduce insulation performance). Observe whether the working fluid is clear; if turbidity, oil slicks, or metal chips appear, start the filter for 10-15 minutes of circulation filtration. Replace the filter element if the contamination is severe.
Temperature and Pressure: Confirm that the temperature displayed by the working fluid chiller is between 20-25℃ (exceeding this range will affect discharge stability and increase surface roughness). Check the working fluid pump pressure (typically 0.3-0.5MPa); if the pressure is abnormal, inspect for pipeline blockages or pump air leaks.
Safety Inspection of the Electrical System
Power Supply and Wiring: Check if the terminal blocks of the main power supply, servo driver, and discharge circuit are loose (verify by gently tightening with an insulated wrench) and if the cable insulation is damaged (to prevent short circuits or electric leakage). Ensure that the emergency stop button and operation panel keys rebound normally, and that indicator lights (e.g., "Power" and "Servo Ready" lights, which should stay on normally) display clearly.
Grounding Resistance: Test the equipment's grounding resistance with a ground resistance tester monthly (≤ 4Ω). Daily preliminary judgment of normal grounding can be made via the "grounding indicator light" (if the light is off, stop the machine for inspection).
Inspection of Mechanical Component Status
Guideways and Ball Screws: Check if the guideway protective covers are intact (to prevent dust/working fluid from entering). Manually move the axes (X/Y/Z axes) to feel for smooth movement without jamming. Check if the ball screw grease is sufficient (an even oil film covering the screw surface is ideal); replenish with dedicated grease (e.g., lithium-based grease) if dryness is observed.
Electrode Chucks and Fixtures: Clean dust and metal chips from the electrode chuck (blow clean with compressed air to avoid chuck looseness causing electrode runout). Check if the fixture fixing bolts are tight and ensure the workpiece clamping datum surface is free of scratches or stains (which affect positioning accuracy).
Cleaning and Reset After Shutdown
Worktable Cleaning: Wipe the worktable surface with a neutral cleaner (e.g., industrial alcohol) to remove residual working fluid and metal chips, preventing rust on the workpiece clamping surface. If residual conductive micro-powders remain after powder-mixed machining (e.g., silicon carbide micro-powder addition), rinse the worktable drainage holes with a high-pressure water gun (in low-pressure mode) to prevent blockages.
Electrode and Tool Storage: Remove unused electrodes and store them in a dry electrode rack by category (mark electrode model and size). Clean the surface of the manual control box and touchscreen (wipe with a soft cloth to avoid scratches from hard objects). Before turning off the main power, confirm that all axes have returned to the "mechanical origin" (to prevent coordinate deviation during the next startup).

II. Weekly Regular Maintenance (Core: Preventing Component Wear and Performance Degradation)
In-depth cleaning and functional verification of the equipment's key components are required weekly, with a focus on easily worn parts and moving components.
Filter and Filter Element Replacement
Working Fluid Filter: Replace the primary working fluid filter element (paper filter element) based on machining volume (e.g., ≥ 20 hours of machining per week). For powder-mixed machining (e.g., adding silicon carbide micro-powders), shorten the replacement cycle (check every 3-5 days; a clogged filter element will reduce working fluid circulation efficiency and affect discharge uniformity).
Air Filter: Clean the air filter of the equipment's air source treatment unit (triplex unit) and drain accumulated water (open the drain valve until no water drips out). Check the oil mist lubricator level (add dedicated pneumatic lubricating oil, keeping the level between 1/3 and 2/3 of the tank) to ensure sufficient lubrication for pneumatic components (e.g., electrode chuck cylinders).
Lubrication System Maintenance
Automatic Lubrication Pump: Check the lubrication pump oil level (using ISO VG32 lubricating oil) and replenish if the level is below the scale. Manually activate the "lubrication test" function (the "LUB TEST" key on the operation panel) and observe if lubricating oil flows out of each lubrication point (guideways, ball screws) to ensure no blockages in the lubrication pipeline.
Guideway Scrapers: Clean the scrapers on both sides of the guideways to remove attached metal chips (worn scrapers will scratch the guideways; check regularly for deformation or damage and replace if wear exceeds 0.5mm).
Discharge Circuit Verification
Gap Voltage Detection: Measure the gap voltage of the discharge circuit with a multimeter (typically 80-100V when no load). If the voltage is abnormal (e.g., below 60V), inspect for aging discharge cables or short-circuit risks between the electrode and workpiece. Test the "automatic arc-clearing circuit" function (simulate a discharge arcing scenario; the equipment should cut off the discharge within 0.5 seconds to avoid electrode burnout).
Process Database Calibration: Select a standard test piece (e.g., SKD11 mold steel), call up common process parameters (e.g., mirror machining parameters for Ra 0.2μm) for trial machining. Test the surface roughness (using a profilometer) and dimensional accuracy (using a micrometer) of the machined test piece. If the deviation exceeds ±0.005mm, calibrate the process database parameters or check the servo system gain.
III. Monthly Servicing (Core: Ensuring High Precision and System Stability)
Monthly servicing requires collaboration with equipment maintenance personnel to professionally calibrate the equipment's accuracy, electrical system, and key components.
Geometric Accuracy Calibration
Axis Positioning Accuracy: Use a laser interferometer to test the positioning accuracy and repeat positioning accuracy of the X/Y/Z axes (must meet the equipment's factory standards, e.g., repeat positioning accuracy ≤ 2μm). If the deviation exceeds the range, correct it via the "error compensation" function of the servo driver (requires professional operation).
Perpendicularity and Parallelism: Use a square box and dial indicator to test the perpendicularity between the X and Y axes (≤ 0.003mm/100mm) and between the Z axis and the worktable surface (≤ 0.002mm/100mm). If out of tolerance, adjust the guideway shims or ball screw bearing preload.
In-Depth Inspection of the Electrical System
Servo Driver and PLC: Open the electrical cabinet and clean dust from the surfaces of the driver and PLC modules (blow clean with compressed air to avoid overheating due to poor heat dissipation). Check if the driver parameters (e.g., current limit, gain value) match the equipment and record key parameters (to prevent modification due to misoperation).
Discharge Power Module: Test the output current stability of the discharge power supply (measure the pulse current waveform with an oscilloscope; no obvious noise should be present). Check for oxidation on the module terminal blocks (polish with sandpaper and apply conductive paste to prevent increased contact resistance).
Replacement of Easily Worn Parts
Electrode Chuck: Check the chuck's clamping force (clamp a φ10mm electrode; no obvious looseness should be felt when manually twisting). If the clamping force decreases (e.g., due to inner wall wear), replace the chuck bushing or the entire chuck (to avoid machining dimensional errors caused by electrode runout).
Seals and Oil Seals: Check for leaks in the seals of the working fluid pipeline (e.g., at joints) and the oil seals of the ball screws. If working fluid drips, replace the seals to prevent working fluid from seeping into the ball screws and causing rust.
IV. Quarterly In-Depth Maintenance (Core: Extending the Service Life of Core Components)
A comprehensive disassembly and inspection of the equipment is required every 3 months, with a focus on maintaining components that are prone to aging after long-term operation.
Overhaul of Ball Screws and Guideways
Ball Screw Disassembly and Cleaning: Remove the ball screw protective cover, clean old grease from the screw surface with kerosene, and check for wear or damage to the screw threads (e.g., tooth deformation). Replace the bearings at both ends of the screw (usually angular contact ball bearings) and adjust the bearing preload (to eliminate axial clearance and ensure transmission accuracy).
Guideway Accuracy Restoration: Repair scratches on the guideway surface with a guideway grinder (if the scratch depth is ≤ 0.01mm, manual lapping can be used). Reapply dedicated guideway grease to ensure even lubrication between the guideways and sliders (insufficient lubrication accelerates guideway wear and affects positioning accuracy).
Comprehensive Cleaning of the Working Fluid System
Working Fluid Tank Cleaning: Drain the working fluid tank, rinse residual impurities and micro-powders from the tank inner wall with a high-pressure water gun, and refill with new working fluid after drying (filter before use to avoid impurities affecting discharge). Check the heat sink of the working fluid chiller and blow away dust with compressed air (poor heat dissipation causes the working fluid temperature to rise, affecting machining stability).
Electrical Cabinet Heat Dissipation and Insulation Testing
Cooling Fans: Clean the cooling fans in the electrical cabinet (e.g., servo driver fans, power module fans) and check if the fan speed is normal (no abnormal noise or jamming). Replace aging fans (used for more than 2 years) in advance to prevent component burnout due to overheating.
Insulation Resistance: Test the insulation resistance of each circuit in the electrical cabinet with a megohmmeter (phase-to-phase insulation ≥ 10MΩ, phase-to-ground insulation ≥ 5MΩ), focusing on the insulation layer of the discharge circuit cables (to avoid electric leakage due to aging).
V. Maintenance Precautions (Core: Avoiding Operational Risks and Secondary Damage)
Safety Standards
Power-Off Operation: When maintaining electrical components (e.g., terminal blocks, drivers), turn off the main power and hang a "Under Maintenance" warning sign. Live operation is strictly prohibited.
Working Fluid Protection: Wear oil-resistant gloves when in contact with working fluid to avoid skin irritation from the fluid (which contains rust inhibitors). Wear a dust mask during powder-mixed machining to prevent inhalation of conductive micro-powders.
Consumable Selection
Dedicated Consumables: Use only original or matching consumables, such as working fluid (must meet the "special insulating fluid for EDM" standard, with a dielectric loss ≤ 0.02), grease (avoid ordinary grease, which causes ball screw corrosion), and filter elements (must match the filter model to prevent leakage).
Electrode Materials: Store copper electrodes and graphite electrodes separately (graphite dust accelerates copper electrode oxidation) and avoid long-term exposure to humid environments (humidity ≤ 60% is recommended).
Fault Recording and Tracing
Establish a Maintenance Log: Record the maintenance time, content, and replaced component models (e.g., "2024.05.10 Replaced X-axis ball screw bearing, Model XXX") as well as abnormalities during machining (e.g., "Frequent discharge arcing; discharge circuit cleaned"). This facilitates later fault cause tracing.
Immediate Shutdown: If critical issues are found during maintenance (e.g., severe guideway scratches, discharge power supply failure), stop the machine immediately and contact the equipment manufacturer's after-sales personnel. Do not force startup, as this may cause irreversible damage to the equipment.
Through the above systematic maintenance and servicing, mirror EDM machines can maintain high-precision machining performance for a long time, reducing unplanned downtime (target: ≤ 2 hours/month) and lowering long-term maintenance costs (standardized maintenance can reduce repair costs by 30%-50%), providing stable support for the precision machining of complex mold cavities.


 Phone
Phone
Comment
(0)